Thursday, June 8, 2017

Up-cycling with Chalk Paint!

 
So we have moved from an apartment into a house and with that has come a certain lack of furniture. Now with a larger than rent mortgage to pay; we are trying to be as thrifty yet as stylish as possible with our décor and that is where the chalk paint has come in.

To be honest, I am personally a fan on unique pieces of furniture so when I found out about Chalk paint a number of years ago, I was instantly in love. I joined every Annie Sloan Facebook group I could find, followed blogs, pinned pins and even purchased all of Annie Sloan's books. The only challenge I found was the availability of purchasing Annie Sloan paint; she seems to be very selective with the stores she choses to sell in and I have have found it hard to find.

Another Annie Sloan con for some people may be her colors selection does tend to be somewhat limited as well - This doesn't phase me too much mind you because I am pretty "safe" with my chalk painting.
 

I have in the past, and do love working with Annie Sloan paint. Annie Sloan is fantastic you can paint on wood, metal, plastic EVEN FABRIC and you can have classy flawless finish or a shabby chic look depending on your style and the method you use. Since I did run into the issue of availability in the US I started looking at other brands. So when I found Valspar's version of chalk paint in Lowes I was overjoyed. - I am not sure if Valpar's brand works on fabric as well but I have painted wood, metal and plastic with it and it has worked perfectly. Valspar is a great chalk paint and I have made some gorgeous pieces with it and another pro is Valspar also offers a wider variety of colors too.

As chalk painting becomes increasingly popular; more and more brands are releasing their own versions - so little by little, I may start playing with other brands too.

Over the years I have made a couple of pieces with chalk paint you can check them all out here:
 
Here is a bedside table I up-cycled for my sisters new flat, I used Annie Sloan Paint here.
Table: Hand down
Paint: $40 (two colors)
Wax: $24.95


Ikea Bedside Table (BEFORE)
Ikea Bedside Table (AFTER)


Ikea Bedside Table (AFTER) -I also painted the door incase my sister wanted to
 use it again but we decided we liked it better without.


This next item was a direct #pinterestcopy with an amazing Goodwill mirror find, I used Valspar Chalk Paint for this.
Frame Cost me: $10, Paint $30, Wax Leftover
 
BEFORE

AFTER


I forgot to take any before pics of this one but these tables and chairs were completely wooden and I painted parts of them white, also re-stained the wood to give it that rich honey glow

 
After

After


The Next was for our own bedroom as I wanted very specific Bedside tables
Shelves cost me $15 in Total, Paint $30. Wax Leftover

 
BEFORE

AFTER


Some Bedroom Furniture Upcycling I did - these are kind of my faves


Before

 
After

After


I also painted that 2nd larger dresser too and added new handles. 


Then one of my latest pieces was this Dry Sink tuned "dumping station" for my kids School bags and School work. I'm so happy with how this turned out!
Dry Sink $25
Paint $30
Wax Leftovers

 
Before

After

After


Not too Shabby right?!

So the number one reason that I LOVE chalk paint is really because I am lazy! I like things to happen fast and I will usually always find the quickest and easiest way to do them. Chalk paint is AMAZING because you rarely need to sand and you never need to prime when using it; you can literally just slap the paint right on. Yup SLAP IT ON, I've even had my 6 and 4 year old do it.

My latest project was upcycling this Console/Hutch that had been sitting in a storage unit for 2 years. The Hutch is beautiful and I would have loved to have done something with it (maybe taken the glass out and added some chicken wire to make it farm housey) but we don't have the wall space for it at this point in time. But I definitely had use for the Console/Buffet so got to work on it right away.

A number of my friends have requested I go through the steps of what I did so I just thought I'd break it down for everyone.

Now there are master Chalk Painters, Furniture Flippers and UpCyclers alike out there so I suggest you also check out their blogs to learn more about the best tips and tricks as well as seeing just how amazing this paint can be and how far it will take you..... I have seen people do amazing things with it... so def go out there into the world of chalk paint and see for yourselves!!!

But for now.... This is:


HOW I PAINTED MY HUTCH
 
Step 1: What I Used
 
  • Chalk Paint - I chose Valspar's Medium Base Chalk Paint and Added the Color "Kids Gloves" 
  • Valspar's Sealing Wax
  • Foam Roller
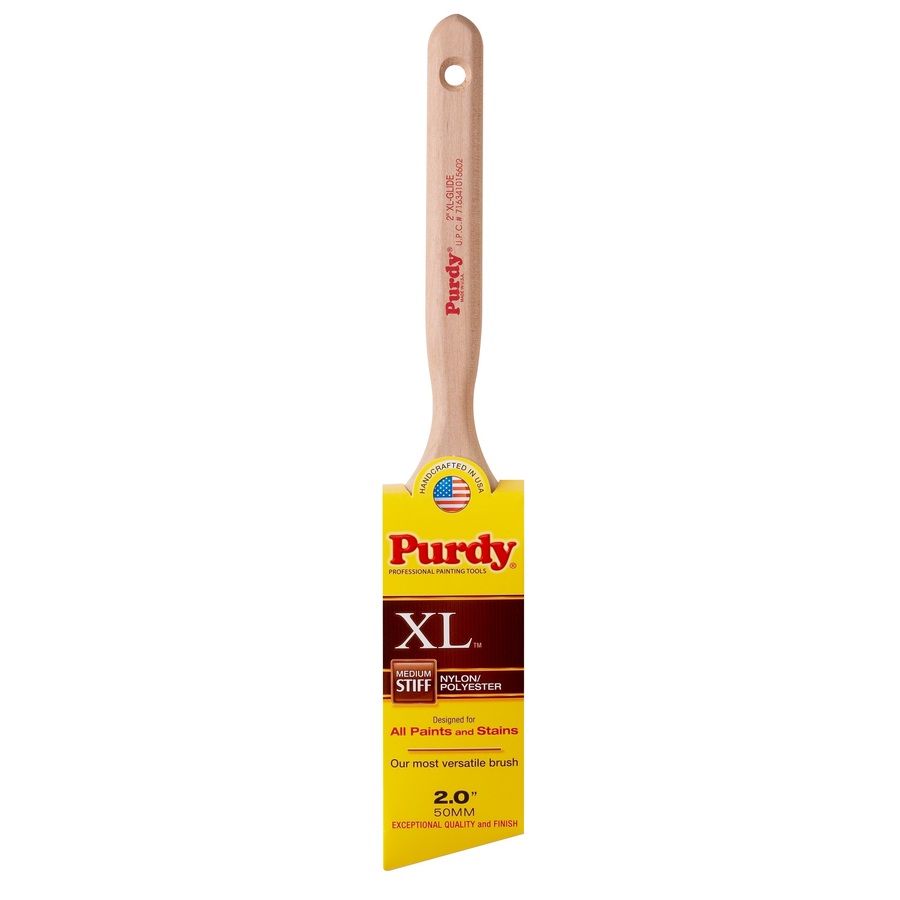
  • Paint Brush - I like the Purdy Brand the best.
  • Paint Tray
  • Mixing stick
  • Tarp or floor protection
  • A piece of furniture to paint ;)
  • A number of rags.
  • A well vented room, although the chalk paint is non-toxic, when applying the wax; it is suggested that you apply it in a well ventilated area.
 
Step 2 - Prep the furniture

So for this I just gave it a wee wipe down with cleaning wipes and got all of the dust off, I lightly sanded some scratches that I found on the corners and truth be told I could have maybe sanded a couple more spots to make it a bit more cleaner, but I kind of liked the character that the bumps and nicks gave to it. for this I was going for a bit more of a farmhouse feel.

Annie Sloane does sometimes suggests when you have extra oily and varnished surfaces to clean it first with low odor mineral spirits to get rid of any crud or avoid any or varnish oil bleed-through. I probably should have done something like this with this piece as I did have some cracking but instead, once I saw the cracking, I used some Kiltz primer and then later painted back over it. -Thankfully an easy enough fix.


I took out the drawers and took off the doors and all of the handles and hardware and put them to the side.
 ( I placed them in a container to make sure that I didn't lose anything as I wanted to reuse them all) 

STEP 3 - Start Painting

Yup that's right; no excessive sanding or priming needed, I just got painting.


I started with the drawers and doors just to see how the paint was working


Then I moved them to the side to dry and got to work on the hutch.  
 
 
I usually use a foam roller for all of my pieces but for this I wanted it a little more rustic so decided to use the roller but then go over it after with the brush to give it the "brushed look". I also used the brush for all of the corners and detail

I applied one coat and left it to dry over night. The can says it dries within one hour to the touch - the can lies! lol.
 
Another tip I had when painting flat top furniture was to turn it upside down and to paint the top last. This was the first time I did that but I was glad that I did. definitely worked better for me.

PAINT KEEP TIP. While waiting for your coats to dry and overnight - Place your paint tray, brushes and rollers in a "tied tight" sealed plastic bag, then the next morning it will be ready to use again.
 
 
STEP 4 - 2nd Coat

The next morning I applied the second coat of paint, just used the same easy slap on and paint method then finely cleaned it up with the brush strokes - I like to think of the fence painting in the Karate Kid when I do this.


You can really see the difference here of one coat versus two. Its actually also a really cool Shabby-Chic look with just the one coat, if this is the look you are going for it can also be really nice.


I slapped on my second coat and left it to dry for a couple of hours Later that evening I flipped it back over and did my first coat on the top. I again let that dry overnight, then added the second coat very quickly the next morning.

STEP 5 - Putting it back together

Since the drawers and doors were dry I started to reassemble them all - this was a fun jigsaw of what went where and which way up it all was - thankfully I had that before picture to reference. Some mistakes were made and touch ups of paint had to be done because of that.

I did some touch ups and actually added a third coat of paint to my sides and the top. That was just a personal choice. I normally just do the two coats. This was also where I had to fix my cracking paint with the Kiltz primer. The cracking has never happened to me before, but this piece had a lot of old varnish on it, so I am thinking that's why it happened.
 
STEP 6 - Apply the wax


Your wax can chose the look you want vs clear or antique, light or dark - so be careful what tub you pick up... I usually use clear.
 
Now that it was all dry and put back together it was time to apply the wax. I just think of this as like giving it a really deep clean polish. I take my rag and the wax and I just go to town smoothing it into the whole item. Some people like using waxing brushes, I just like a good old rag and I jut rub it into the piece. You don't want too use too much wax when applying, but do apply generously "like applying lotion" this just seals everything in.
The best way to describe it is to rub it right into the wood, you don't want the wax sitting on top of the wood, you want it in the wood.

I will often wait 24 hours and repeat this process again. Be sure to not miss any spots, you will notice them. This is the final finish to your piece.

Here is a tutorial I found  on YouTube for wax application:
Annie Sloan Chalk Paint Wax Clear Tutorial #3 Locksley Lane

STEP 7 - Admire your work

And Hey Presto You are Done!

Take a step back, admire your piece and think about how cool it is that you brought something back to life.

 
***FINAL PIC TO COME!!!
 - Need to get the lads to move it upstairs for me ;)***


Thank you so much for stopping by, I cant wait to see what projects you guys come up with. Please feel free to share them below.


Best Wishes

Georgia xxx


Monday, February 22, 2016

8 Ways To Take Care Of Yourself (while you are taking care of everyone else.)


 Whether a busy working parent, or an equally as busy parent who stays at home,  it is very easy to forget ourselves on a daily basis. We dedicate our entire lives to running our family, keeping our children alive, paying bills, keeping a roof over our heads and all sorts of other fun parental responsibilities as imperfectly, perfectly  as we can.  While we do such a great job (or as good as we can do) of taking care of all of those around us, we tend to not take care of ourselves. We will very easily  work ourselves to the point of stress and exhaustion and completely neglect our own needs.
It is essential for us to be aware of our limits and take care of ourselves when we can, I know, this is way easier said than done, but the truth is your family depends on your own mental and physical balance to be intact so you do NEED to take care of you.

I called in my friend and Health Coach Brianna Hatcher to give us '8 ways to take Care of Yourself (While you are taking care of everyone else)' and I couldn't be more excited,  by trying her ideas you  are taking a great leap into a better and balanced life.

Every small step counts, even if you pick up just one or two of these pointers you will at least be doing something for you, and that is more important than anything.

These are great tips and I hope you can find this helps you on the way to a happier and balanced life, because even though you are parent, you are still allowed to have that!


8 Ways To Take Care Of Yourself
(while you are taking care of everyone else.)

Brianna Hatcher - Integrative Nutrition Health Coach


1: Remember, you matter.

    Ok, so this isn't a “tip” as much as a reminder. In case you need someone to remind you, you matter. How you feel matters, what you think matters, how much you sleep matters, what you eat matters. Sweet person, YOU matter. Period.


2: Take 5


    Set your alarm 5 minutes earlier. Wait, I know what you're thinking, hear me out. Giving yourself 5 extra minutes in the morning to stretch, Pray, meditate, do yoga, whatever works for you. This really sets the tone for your day. It's waking up and taking charge of your day, instead of waking up and having the day happen to you. Doing the same at night before bed will also give you a nice slow down before putting your head on the pillow, if you don't fall asleep in the meantime


3: Pack Snacks

    How many times have you ended up digging at the bottom of your bag for a leftover snack from the kids? If you're anything like me, too many. Pack yourself a real, grown up snack. The nice kind of snack cheese, trail mix with dried cherries and dark chocolate, or whatever suits your fancy. You getting real food, that is intended for you, is not a treat but a necessity. Because it, you know, keeps you alive.


4: Drink Up! Water that is. (I'll leave the other beverage choices up to you) Drinking enough water is going to do so many things for you, it will increase your energy, improve your skin, help with digestion, cut back on cravings, along with countless other benefits. An easy way to know how much water you should aim for is by taking your weight in pounds, cut that in half, and that is how many ounces of water you can try to work into your day. Get yourself a pretty water bottle and go for it! I promise you won't have to pee every 5 minutes forever, that goes away.


5: Get Dressed

    I know this is a tough one. We are so busy making sure everyone else is up, dressed, brushed, fed, and out the door that we hardly ever get a chance to do what we need to do to get ready. But the simple act of getting dressed can completely change how someone feels. I'm not saying don't wear your yoga pants out, I'm saying wear them out IF you feel good in them. There is nothing that makes me feel better then to walk by a mirror and feel put together, on the flip side, if I walked past a mirror and feel like I look disheveled, it isn't going to help my emotional state at all. This isn't about what other people see, or what other people think when they see you, it is about how you feel about yourself when you happen to walk by a mirror in a store.


6: Get Yourself Something

    Think about your shopping list, is there anything on there that is just for you? Odds are there is something you purchase just because your husband or wife likes it, or just because your kids like it, but do you get something just because you like it? Make this a habit, when you are shopping make sure you pick something out that is just for you, I don't care if it is a bottle of wine (cough, my favorite, cough!) or a pack of gum. This is a form of self-care by acknowledging what you want, and then giving it to yourself. 


7: Ask For Help

   Listen to this part very carefully, asking for help does not make you less of a Super-Mom/Dad. We all have our limits and there is no shame in admitting when we reach them, better yet, ask for help before you reach your limit. Teach your kids how to do the laundry, tell your husband/wife they are in charge of dinner, ask a friend to watch the kids so you can take a shower in peace, do whatever you need to do so you don't get overwhelmed. We used to have a village around us to help with these things, now we have to make our own. Parenthood is hard, and isn't meant to be done alone.


8: Exercise

   For those of you still reading after you saw “exercise”, I'll go on. This really will make your life easier in the long run. You're going to have more energy, feel happier, feel better in your skin, sleep better, the list goes on and on and on. Even if you just spend 20minutes walking with the stroller, or go to the park and chase the kids around, the more movement the better. Not only is it amazing for you, but you are setting such a wonderful example for your family. The endorphins released during exercise are no joke, they really make a messy kitchen a lot easier to deal with.


BONUS: Homemade face mask recipe


Here is my very favorite way to pamper myself at home. This recipe is great for most skin types and will help smooth, brighten, and hydrate your skin. As always, please make sure you are not allergic to any of these ingredients before using.


Ingredients


¼  Teaspoon Turmeric


1   Heaping Tablespoon Honey


1   Heaping Tablespoon Plain Yogurt


Preparation


Simply mix until smooth and apply to skin with an old, clean, makeup brush. You can use your fingers but fair warning it can be a little messy. Leave on skin 10-15 minutes and rinse with slightly warm to cool water. Pat dry and enjoy your smooth skin.


This may leave a slight yellow tint to your skin, so use at night or when you aren't leaving the house. You can use a very gentle cleanser following the mask if need be. If you really aren't wanting to rock turmeric tinted skin, feel free to leave it out completely, there are plenty of benefits from the honey and yogurt alone. Enjoy!


Brianna Hatcher, Integrative Nutrition Health Coach


Brianna is An Integrative Nutrition Health Coach she is a guide and mentor who empowers her clients and provides ongoing support and guidance as they set goals and make sustainable changes that improve their health and happiness.

HealthCoachingByBrianna.com


Saturday, February 13, 2016

VALENTINES GIFT IDEAS!

My friends were all talking about Valentines ideas about a month ago and I was shocked how organized they were.

It got my creative juices flowing and I thought I would share my gifts for this year....I gathered all of my inspiration from Pinterest then added my own little twist to them!

Super simple and Cost efficient... Might spark your own creative minds or just give you some ideas!


1. Beer Bouquet


2. Sexy Sensory Boxes

                                                      To learn what's inside click here

3. Open When Letters

What on earth are "open when letters?" click here to find out!

So hopefully this will give you some last minute ideas!


4. A Little Black Book


A little Bonus Idea, that takes a bit more preparation & depending on how professional you want to go, is a little more expensive; is a gifting your S.0 with a "Little Black Book" A Book of Boudoir Photos of YOU!!!

Scary, Stepping out the comfort zone but can also be completely liberating - I gifted my husband with one in 2013 and it is still his favorite gift to date! Click here to learn more....


Have a happy Valentines everyone!!!

G x


Friday, February 12, 2016

VALENTINES PRESENT IDEA FOR ADULTS #1 A Sexy Book of Boudoir Photos

VALENTINES BOUDOIR SHOOT FOR YOUR SIGNIFICANT OTHER!

2 Years ago I gifted my husband on Valentines Day with a Sexy "Little Black Book" with photos of myself for him. This is my experience, take a read and maybe this could be a good idea for you!


So one day in early January 2013 My friend and photographer Nishani of Nishani Photography Posted This to Facebook.


It showed up in my newsfeed and I was at a point in life of trying things that scare me and consciously making an effort to step outside of the box. Without really thinking about what it actually was I emailed her almost instantly. She had just done my girl's Christmas photos and I adored her work, I love her as a photographer.... But a Boudoir photo shoot..... WAaaaH.... I had a moment of doubt, then something in me told me to commit. 

The women involved were women I knew and trusted, Nishani and Carla with the Photography, Heather doing Make up and Claudia doing hair, wonderful and supportive women. It was going to be a safe and supportive space and if there was ever a time to do it, now was the time.

It was something for my Husband which I knew he would love. It was also something for me to learn to love and embrace myself the way I am, lumps bumps and all, therefore helping me in myself, in my marriage and as a mother.

I signed up, I was super nervous, I wasn't that long after having my second baby, my body was not looking how I wanted it to look, but I knew I had to embrace my Mommy Body, Love myself and just go for it!
 January 18th came way quicker than I expected. I had booked my friend to babysit the girls, I had bought some sexy lingerie, had my hair done and got my tan on, I had researched Chris' favorite celebrity girls and any boudoir style shoots they may have done, I was as prepared as I could be.

On the train ride in, I was nervous as anything. My stomach was in knots, I felt like I was going to throw up. I actually realized how shy deep down I could be. A complete bundle of nerves all the way to the studio I was shaking as I walked up to the room where I was going to be standing practically naked. All of my negative doubts floated into my head. I'm fat, I look disgusting, what if Chris sees these pictures then actually decides I'm too gross for him? what am I doing? What was I thinking? all these thoughts taking over my mind but something in me kept pushing me to go in and just do it.

I opened the door and was welcomed by these wonderful women. Their energy instantly relaxed me, I asked any questions I had, I shook it off and let the dream team work their magic on me.

Claudia on my Hair and Heather on my make up, whilst Carla selected the perfect play list for me to help relax... this pampering alone and "Me" time, was worth it.


Hair and Make up was done and I felt fabulous, from that point on I did not let one negative thought enter my mind, I put my Sassy on, brought out "Georgia Fierce" and just went for it....

I HAD A BLAST!!!!! Nishani was so professional she made me so comfortable, I thought since she was my friend it might have been a little more difficult but it wasn't at all.

I was all over the place in different poses, I found all the little tricks I used to use when I worked with photographers in the past, I got to change from fun little outfit to fun little outfit. I felt so completely and utterly liberated, I was so empowered. I didn't care that I didn't look like a Victoria Secret model. I felt beautiful and I was super excited to know that this was for the man I loved. I thought about him as I looked down the camera lens, how happy this would make him for many reasons and that lit me up inside. For the first time in a long time, I felt like Me again. Not just a Mummy, Not Just a Wife, but ME, Georgia!

I was getting so comfortable and carried away with it all that towards the end of it I was only covered in his Marine Corps uniform jacket - another hour I could have been butt naked ;)

I finished the session feeling amazing. It was so much fun and definitely something I would tell my friends to try, even if they were taken just for them. It is something that I will cherish forever. Plus in 40 years time when I am old, grey and wrinkly I can look back one day and think "Daymn I was smoking!!!"

This was a fabulous and life changing experience for me and I highly recommend it!


Here are some teasers from my first ever Boudoir Photoshoot.............


Sorry Folks - But the Rest are Reserved.............

Wouldn't be much of a Valentines present if I let everyone see now, would it?! ;)


Oh and By the Way.... Chris LOVED it! He was so impressed with my confidence and loved that it captured me exactly as me! A couple of my friends and family members have had a go since and of course their partners thoroughly appreciate it!


All women have anxieties and insecurities, no matter what size or shape we are. But we are goddesses. When we find the times where we can grasp and hold onto our confidence, be sure of ourselves and shine, Well then we can light up entire rooms!

 I want to take a moment for the woman who like me, had a hard time getting to grips with the new version of themselves post babies.....

Just because we are Mothers who, have on days been covered in our own children's pee and poop, or had days where the bags under our eyes have had our Doctors sending us for Cat Scans and blood work, or weeks where we cant really remember when the last time we shaved our legs was, or even worse, showered! This is nothing! We are STILL SEXY and BEAUTIFUL. WE ARE WOMEN! WE ARE POWERFUL!  Every stretch mark we have on our bodies is a map of our life, it is the story of how powerful our bodies are to carry life, Our breast are worn from feeding our children, entire bodies are changed because we are forever changed and we are beautiful!


Whatever shape or size, whatever we look like, our beauty comes from those moments when we put all of that to the side and let ourselves shine through.

THIS IS A GREAT idea for a Valentines Gift and even better for your own self discovery!!!!

Make sure you keep an eye out for any Local Photographer's specials and just GO FOR IT!!!!


Happy Valentines Day!

<3 G

 If you are interested in working with Nishani Photography and the dream team please follow her on Facebook